


Phoenix
Hello all!
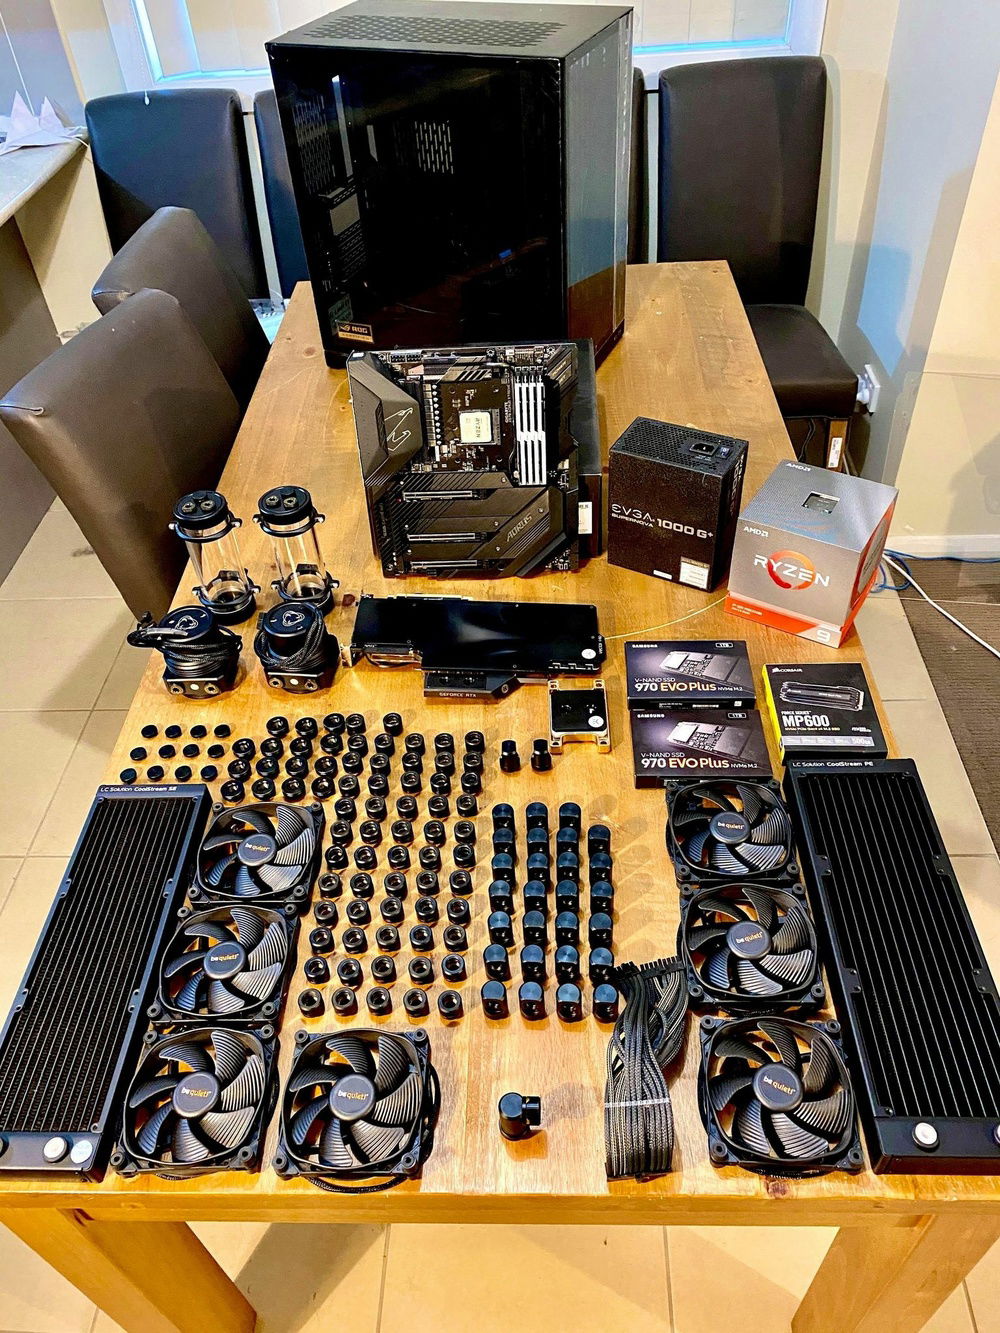
I present to you all PHOENIX my next build. As is tradition there’s also the large build log to take you along the journey that was this build. The aim, as always, is to provide you with an honest insight into the process so you can plan your own and not face the same problems I have had.
Entering this process I had three key objectives I wanted to achieve:
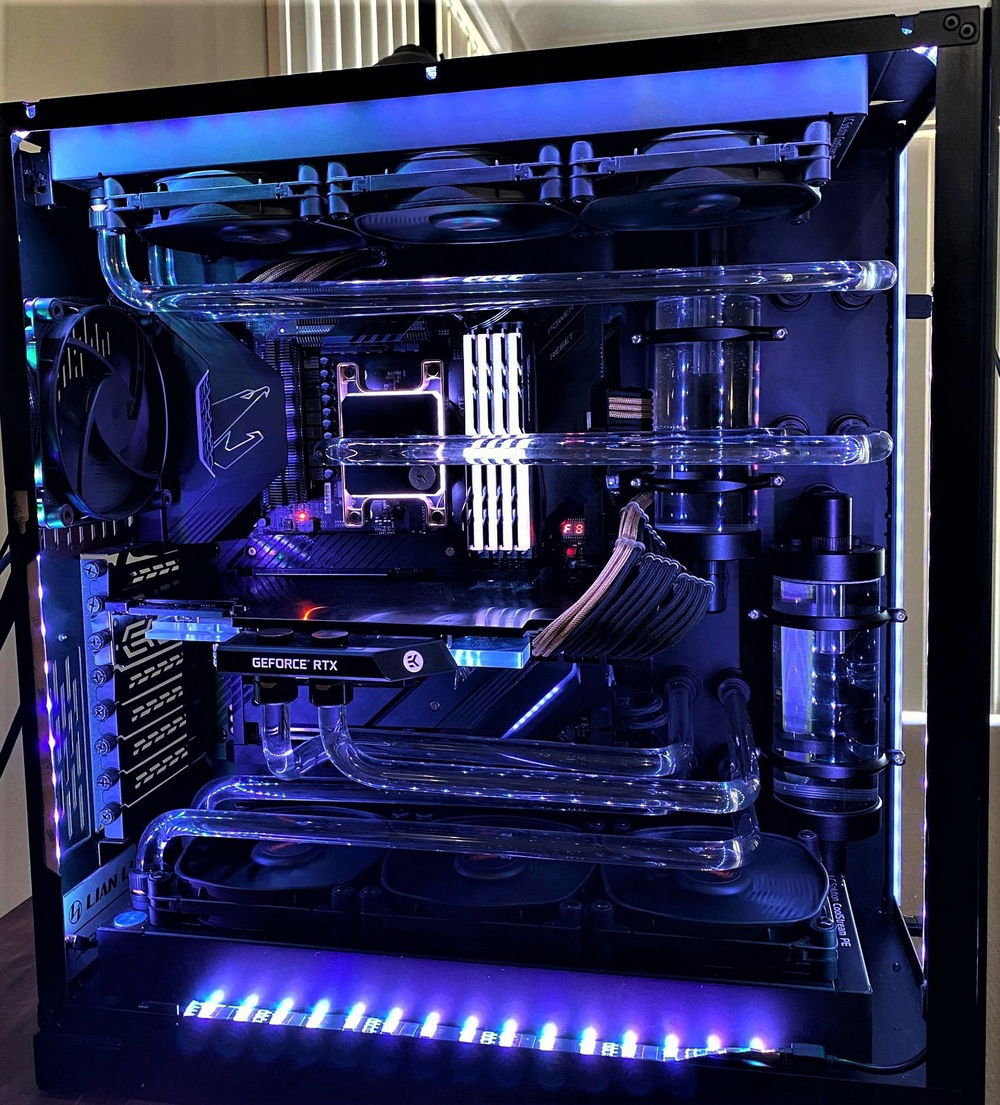
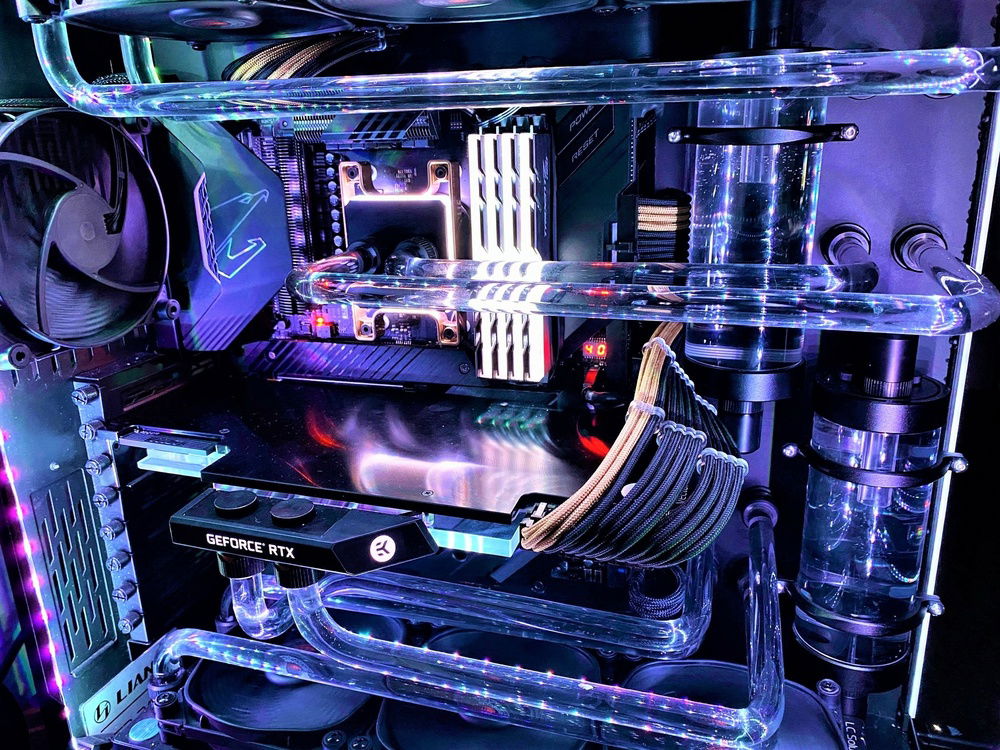
1) Build a true dual loop inside a lian li O11-D
2) Present a unique look in one of the most common cases in the world
3) No RGB, professional finish.
Good news, I think we achieved all of these!
CHALLENGES:
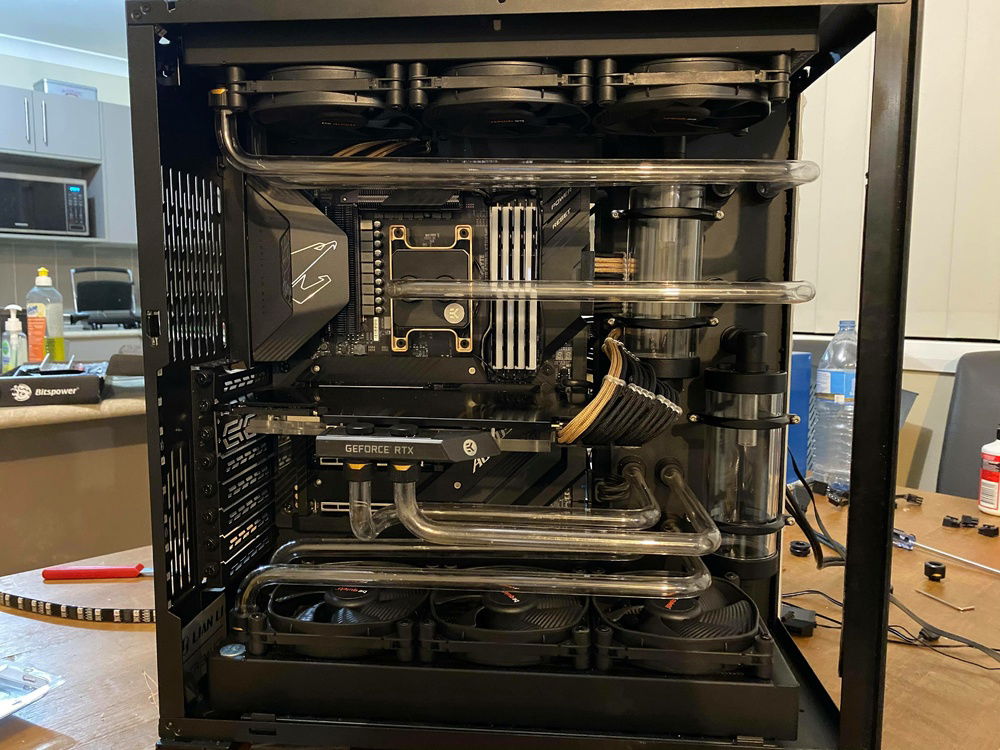
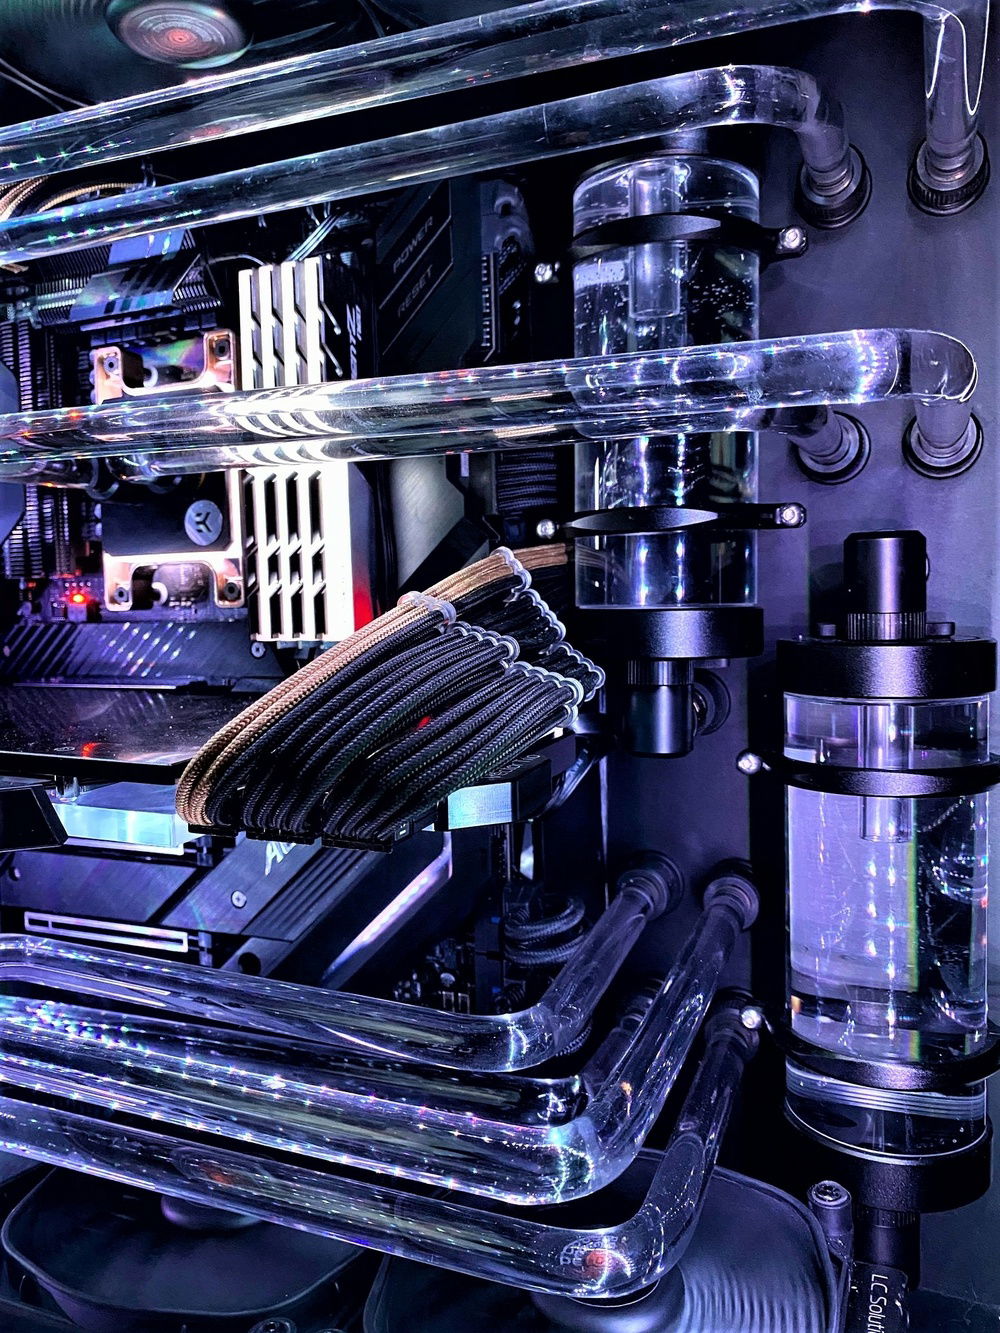
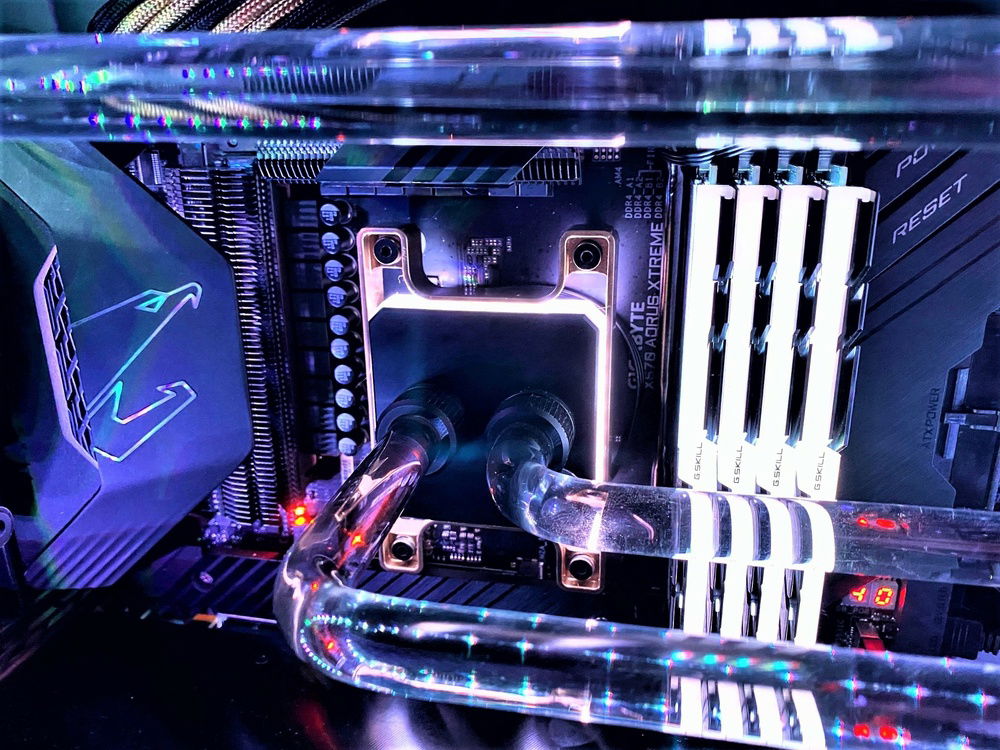
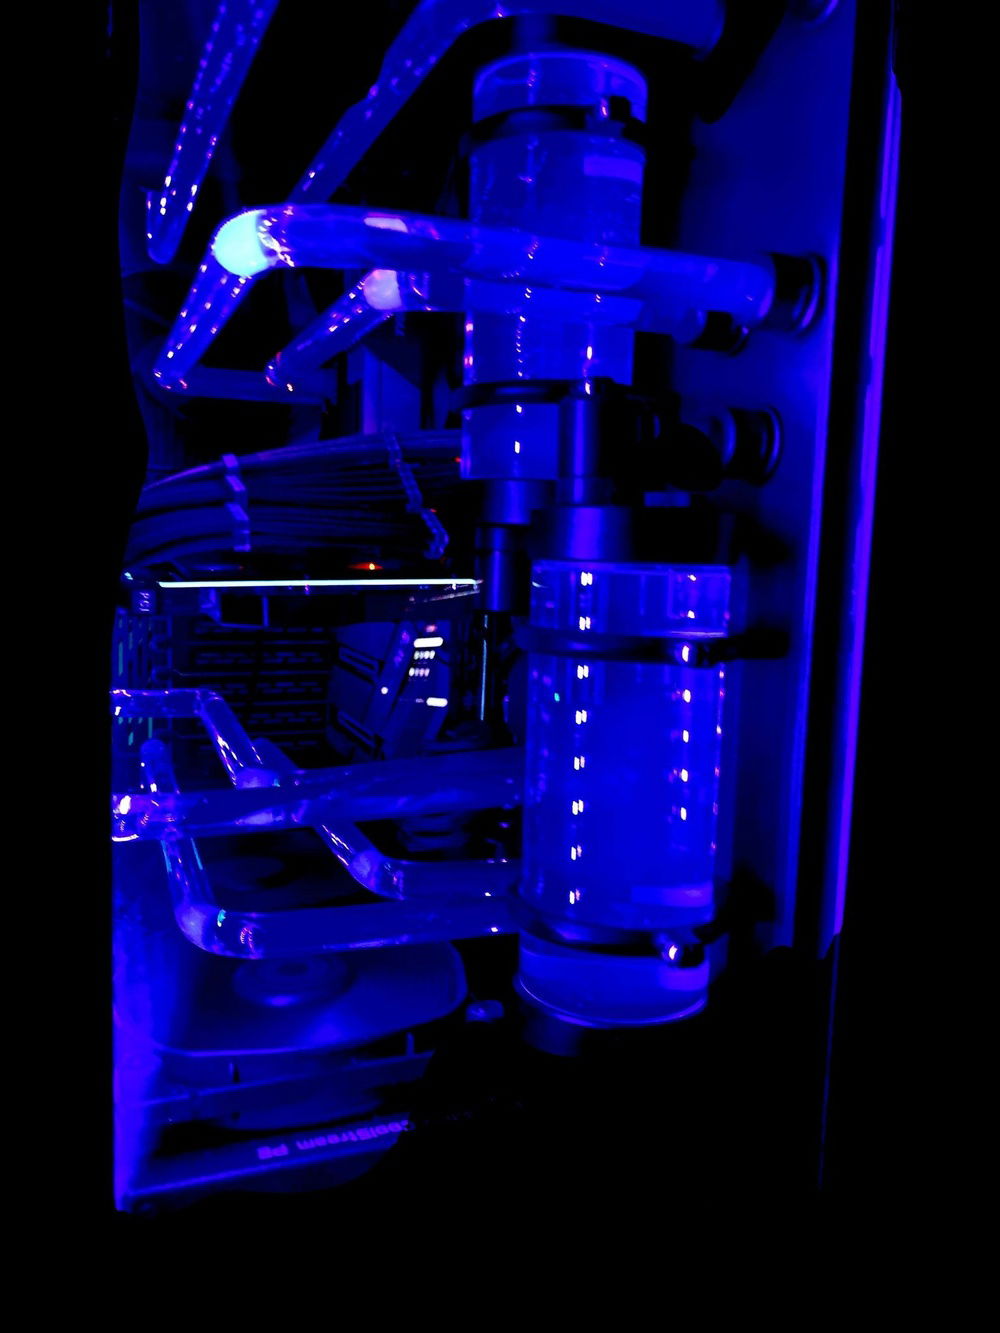
Central Manifold construction: I have never done a full acrylic centre manifold with a bend through the centre before. This provided a challenge in that I used only a heat gun to bend the acrylic and realised too late that I would not be able to bend it twice, once inwards, and then outwards. This meant that I needed to cut the sheet that has the reservoirs off the main piece and attach this later. This is two sheets of acrylic that I have glued and sealed together to form one. The main piece of acrylic was then fastened to the case through four screws that also attached the pumps to the rear. The measurements of the cable holes (done for the first time), screw holes, res mounts all required forward planning and allowed for no errors due to the restriction on space. For first time cable hole drilling I recommend getting one of the cable combs from your cables and using it as a stencil to get your spacing right. If the holes are too far apart then it can separate the cable runs and ruin the look of the run. Additionally, you must take the time to ensure your mounting holes are level and square, if one of these is off then you will have a crooked reservoir and having them next to each other it will really show. I would recommend doing a test mount on a separate sheet to make sure your measurements are correct so you don’t ruin your main piece.
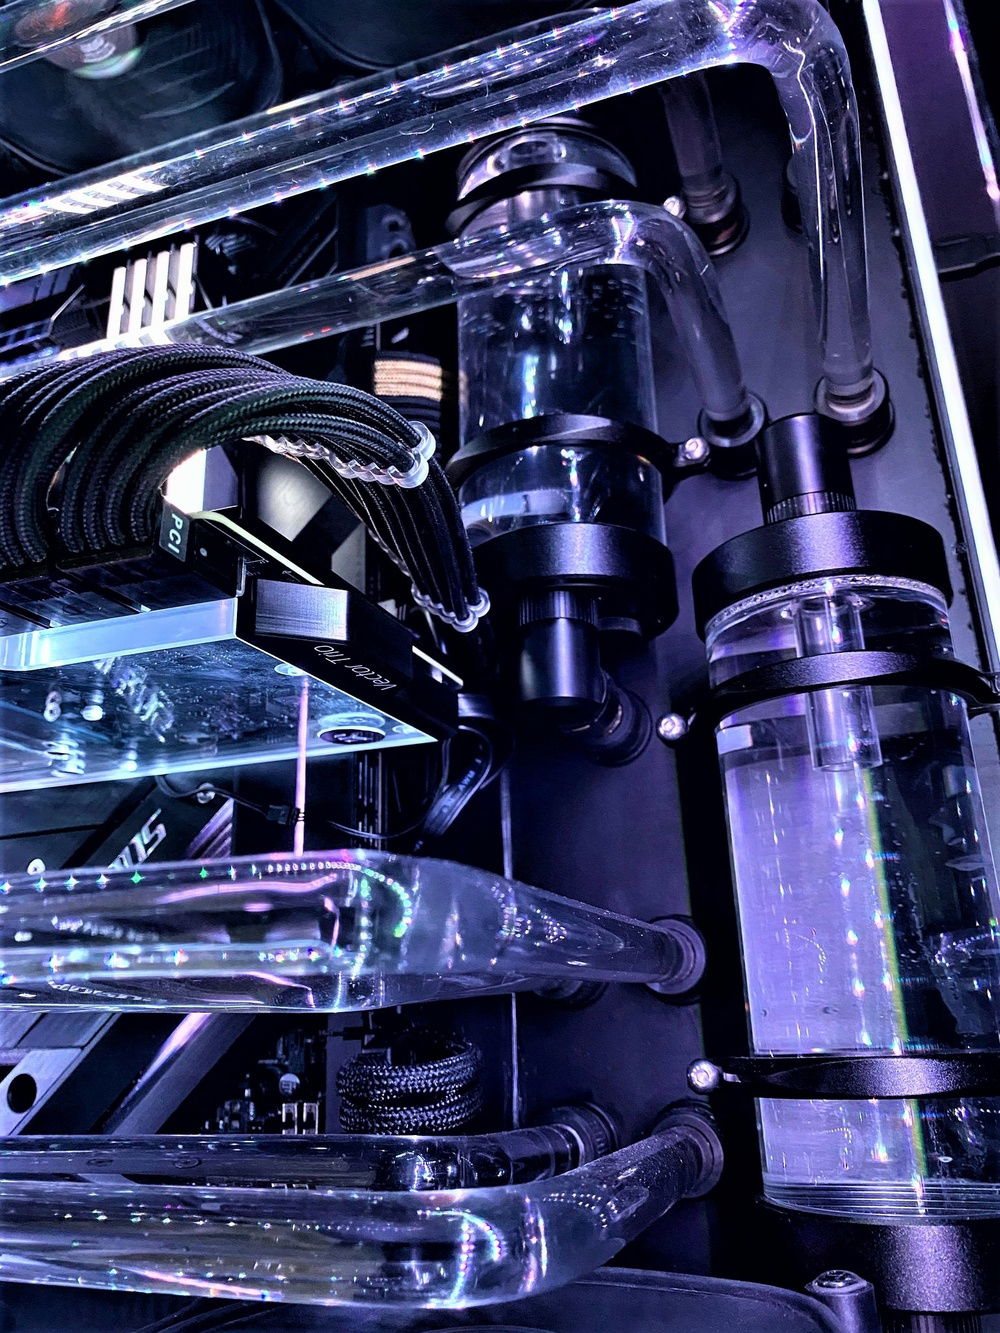
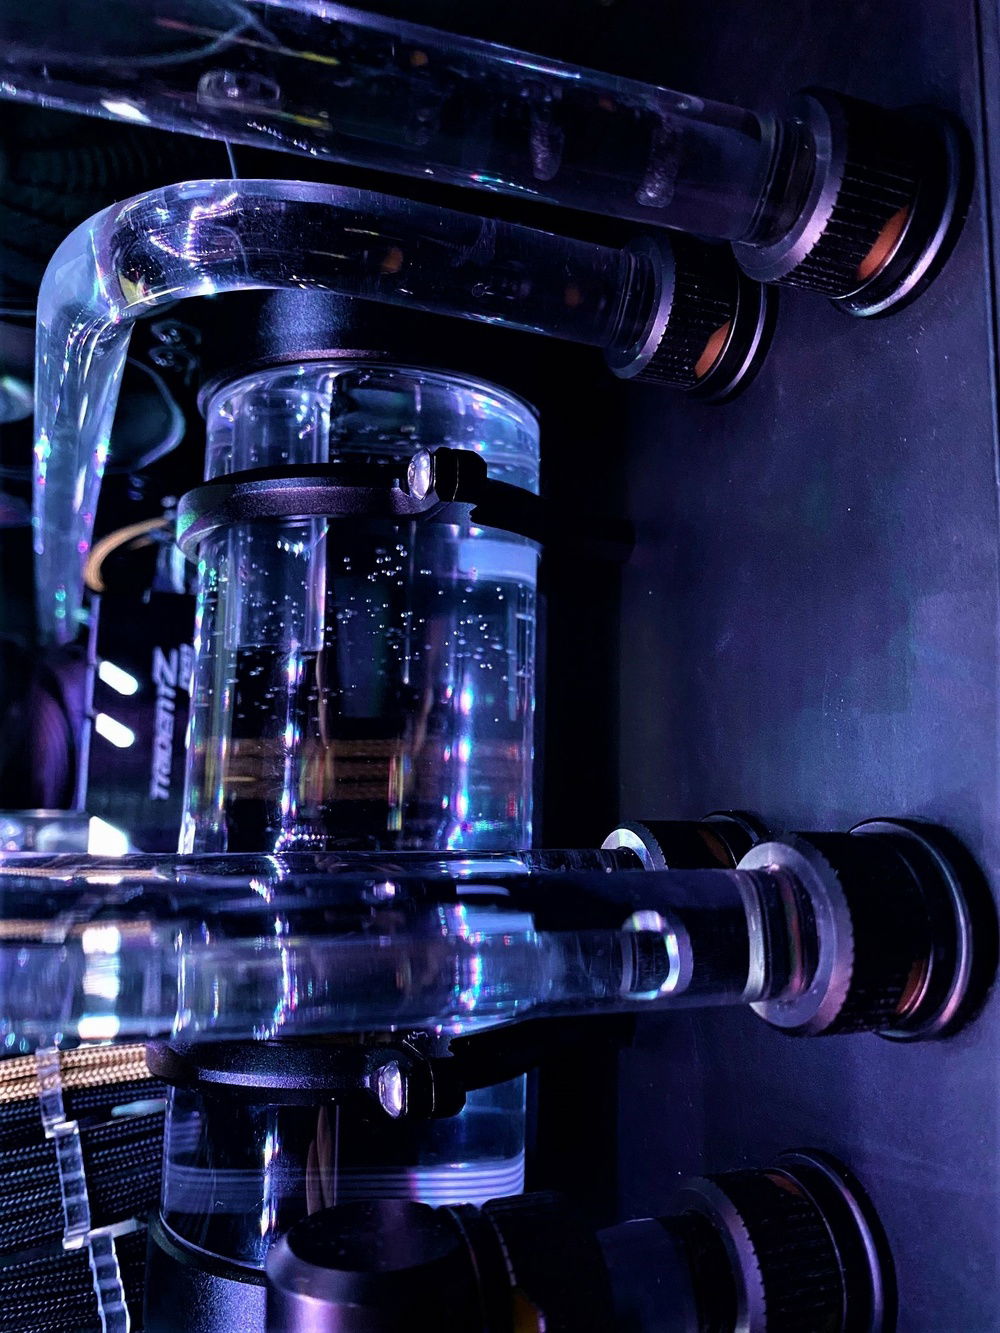
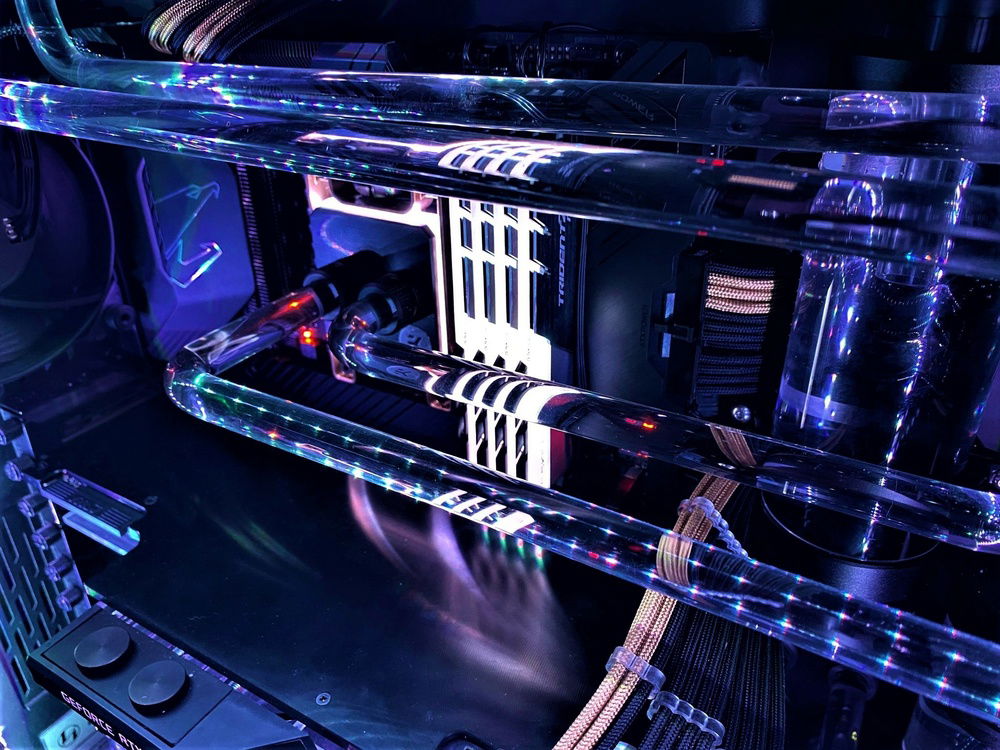
Spacing of Reservoirs: The original plan had them next to each other but due to the lack of space meant that this was not possible. I planned to use the dual ethereal mount from Singularity Computers but this was unavailable, so they were able to switch this for me for four singles. These mounts added additional width and therefore did not allow for parallel mounting. The confined space was restricted further by the requirement for the four pass-throughs and the inlet/outlet ports of the reservoirs. The process of measuring this was the longest part of the build but by far the most important. I would recommend ensuring you have two known straight edges (corners of the acrylic) to use the right-angled rule to achieve true measurements and as always MEASURE TWICE CUT ONCE.
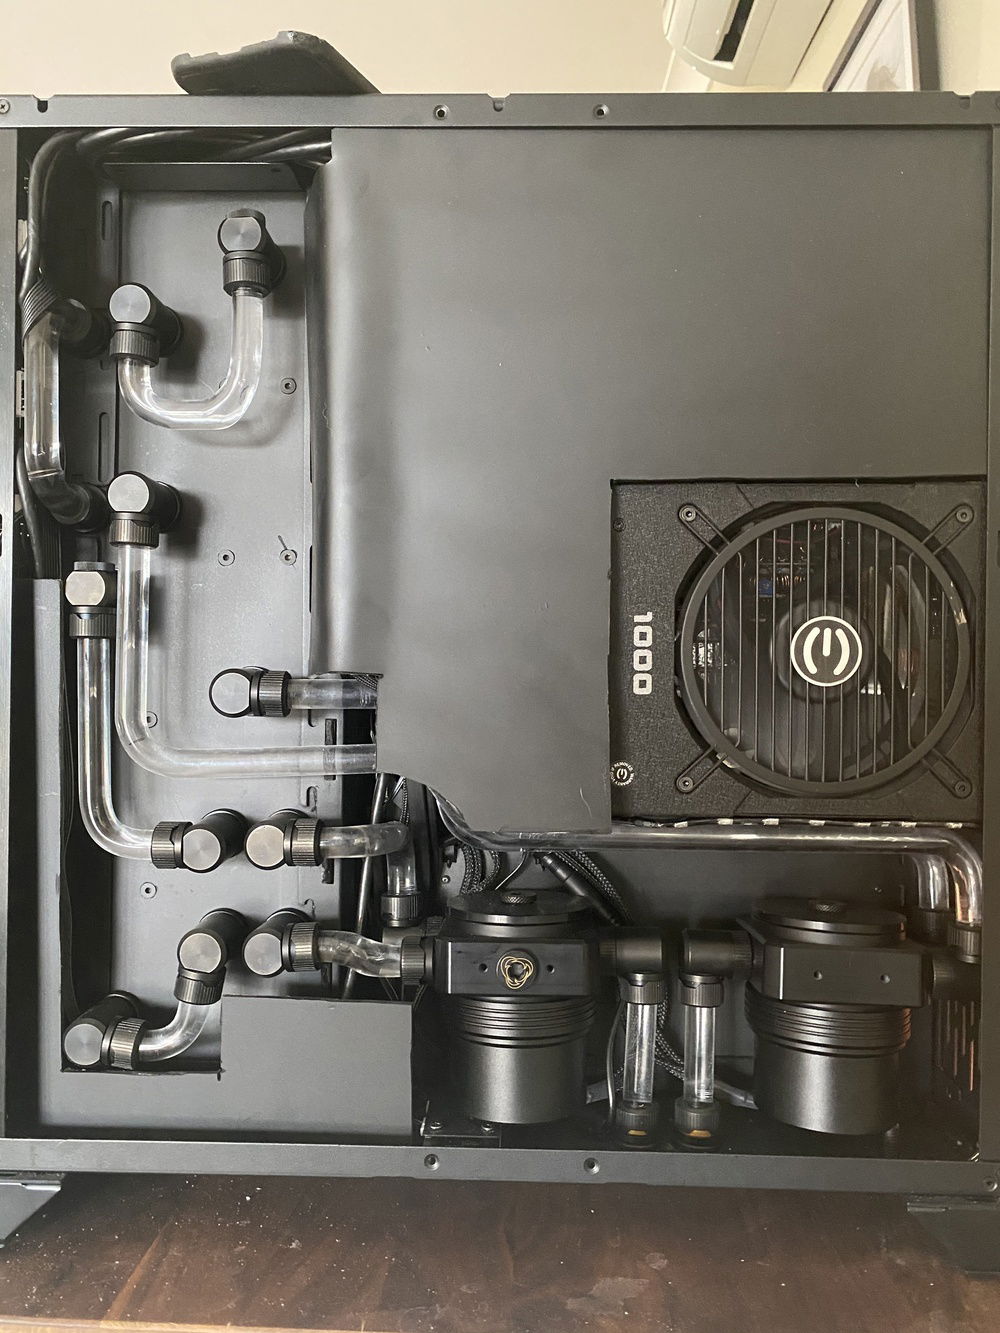
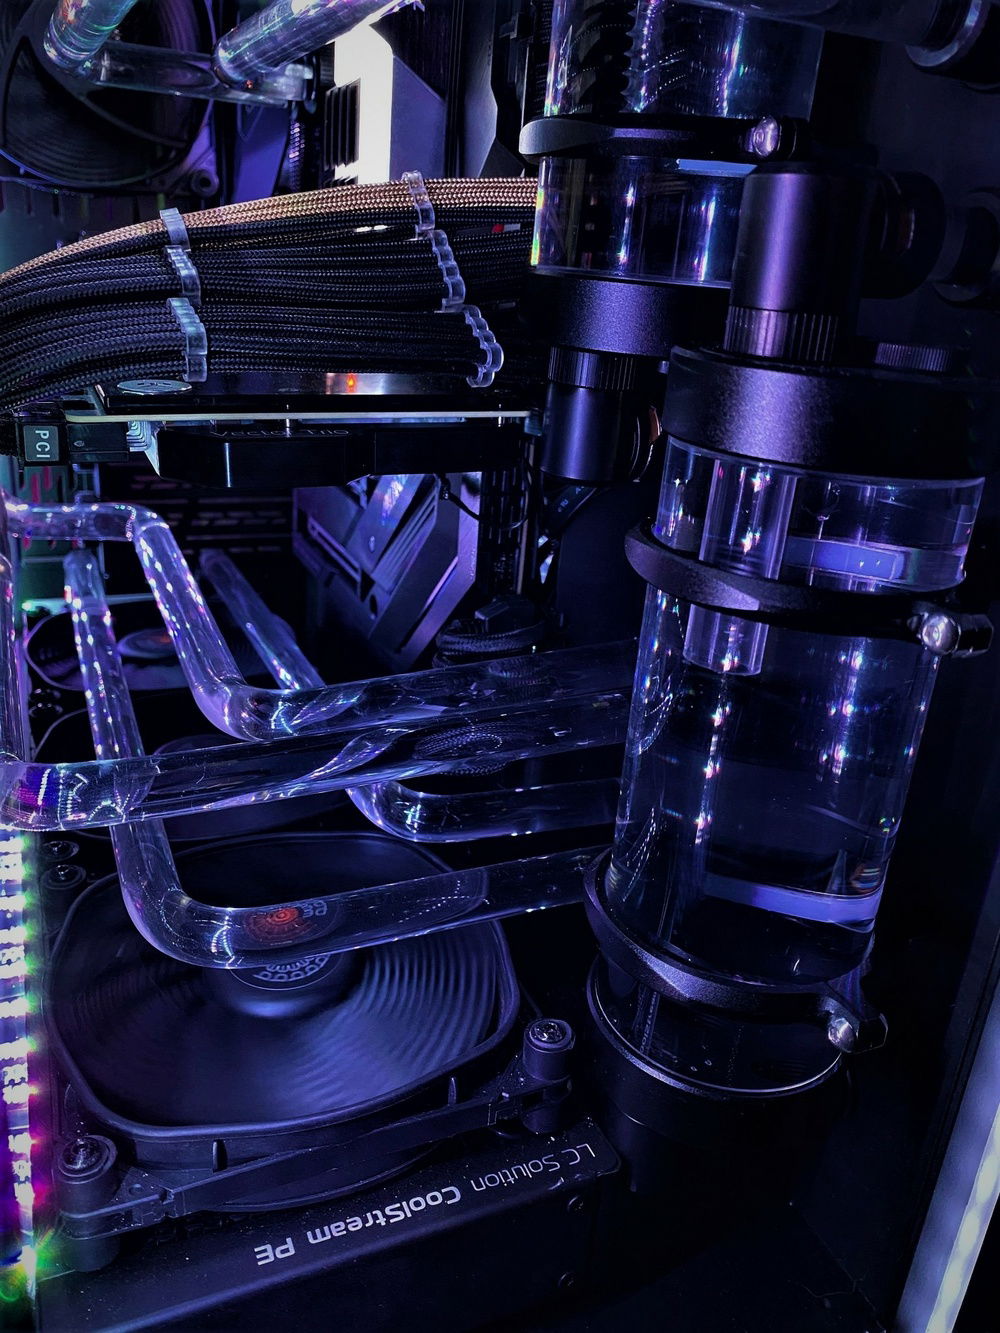
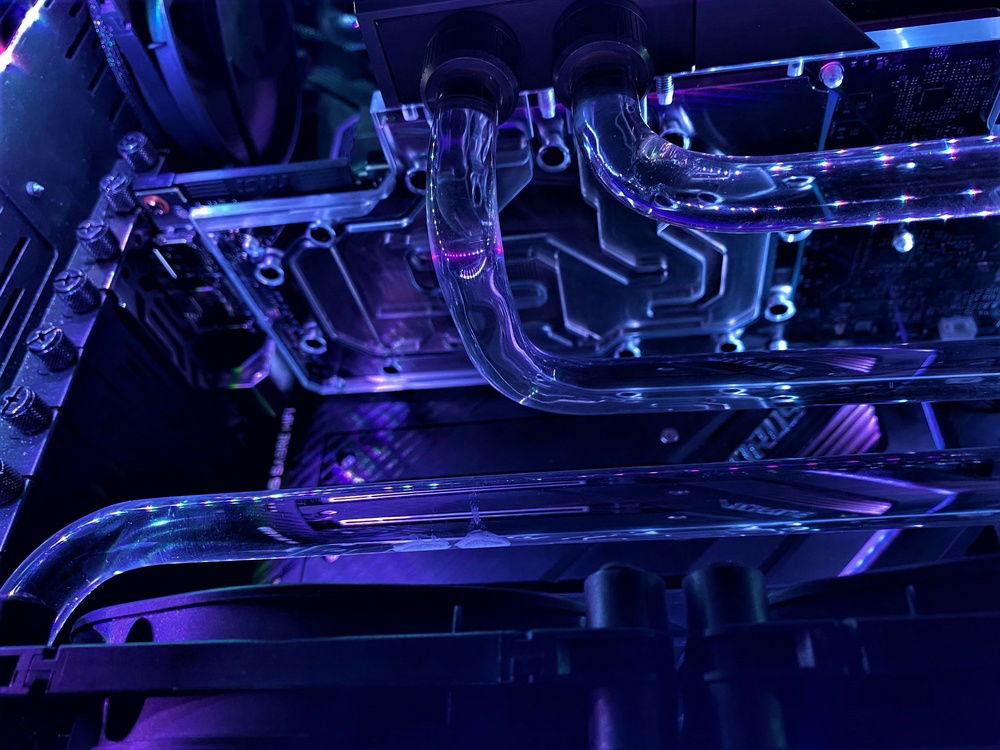
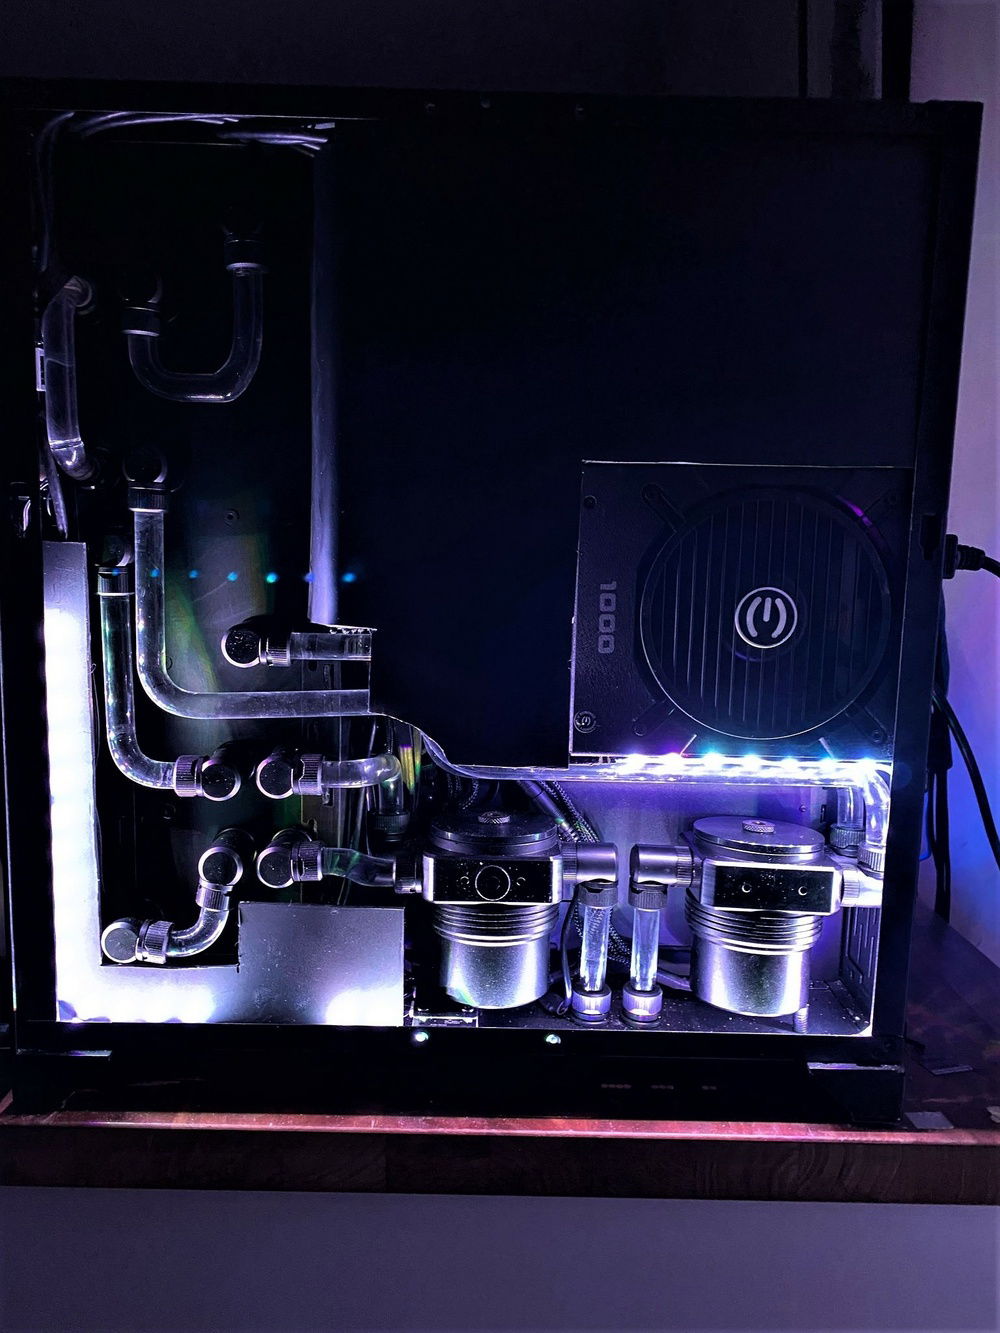
Rear Tubing: As I am a sucker for pain, I decided to do hard tubing in the rear of the case to the two Singularity Computers pumps. These were by far the hardest bends to route and provided an even greater challenge with cable management at the rear. An unforeseen issue with the rear fittings was the conflict between the top right Torque fittings and the rear of the front IO. To overcome this, I used a Dremel on the housing of the USE 3.0 to allow the fittings to slide past which was incredibly tight. It requires that little bit more effort, but I always feel it is worth it to have the tidy front and read tubing. I will continue to work on the rear of the case into the future to tidy this further.
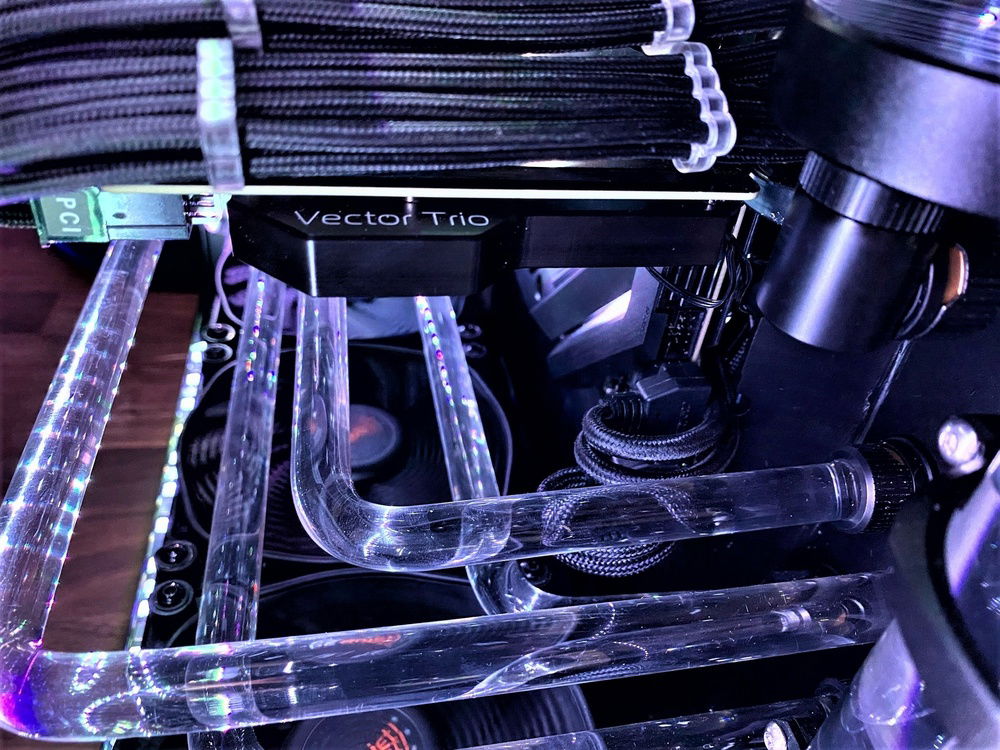
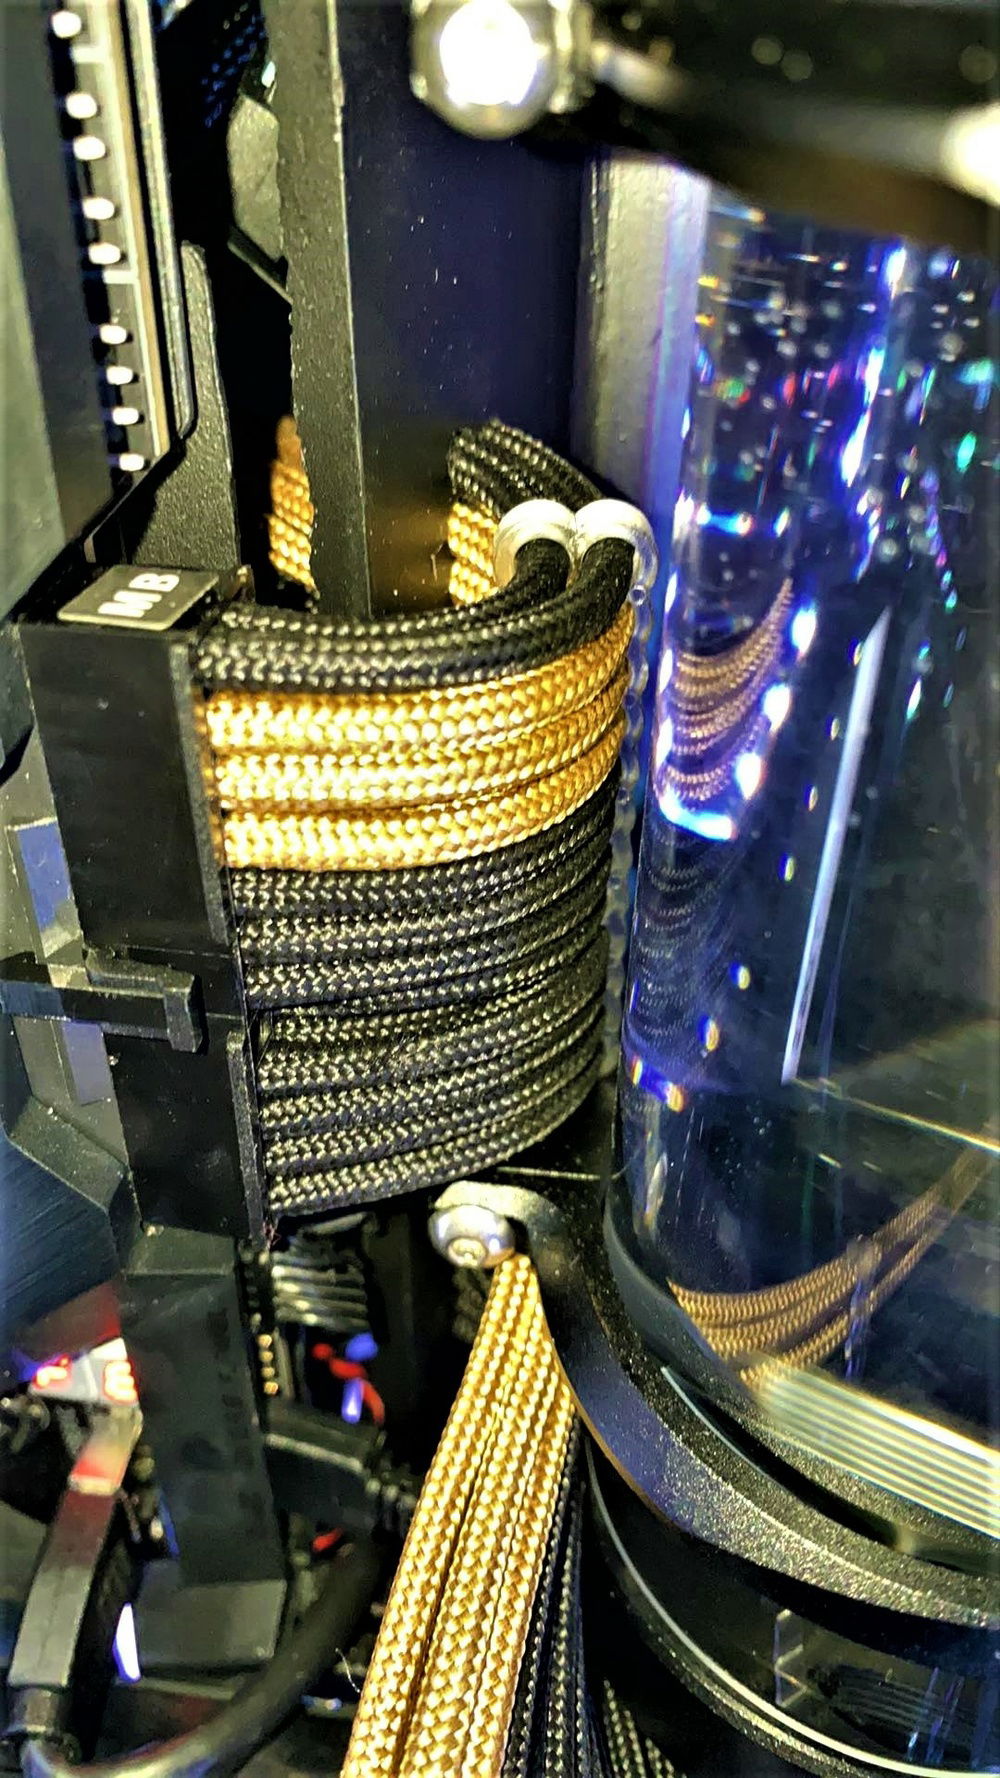
Rear Cable management: The cables are bunched at the top of the case, but this looked messy. I made a cover for them and this will be refined later. It achieved what I needed it to do for now. Small zip ties are your friend! I had additional cables that will be added in the future to reduce the amount of clutter and will hopefully allow me to remove the makeshift shroud.
Rear mount pumps: The spacing of the pumps and the PSU was challenging as this meant that the hard bends required a tight 90 degrees straight out of the pump to not hit the PSU directly above it. Having them in the rear increases the heat in the back of the case quite significantly. Though noticeable this has not provided any issues so far as it does not flow into the front of the case except for next the motherboard on the righthand side. The top and bottom fans extract this before it gets to the main chassis though.
Airflow: Originally the fan at the top left was not there. This caused temperature issues due to the restricted airflow which was caused by the new acrylic manifold blocking the intakes and the two radiators are on exhaust. I thought that there would be enough air drawn in through the back of the case but this was not what happened and I had a spare fan which went into that place perfectly. It works off its own fan curve that is 10% faster than the CPU fans. As it sits in the rear of the case this is not noticeable. The addition of the fan provided the necessary airflow which lowered the overall temperatures of the case and the systems in it.
PROS:
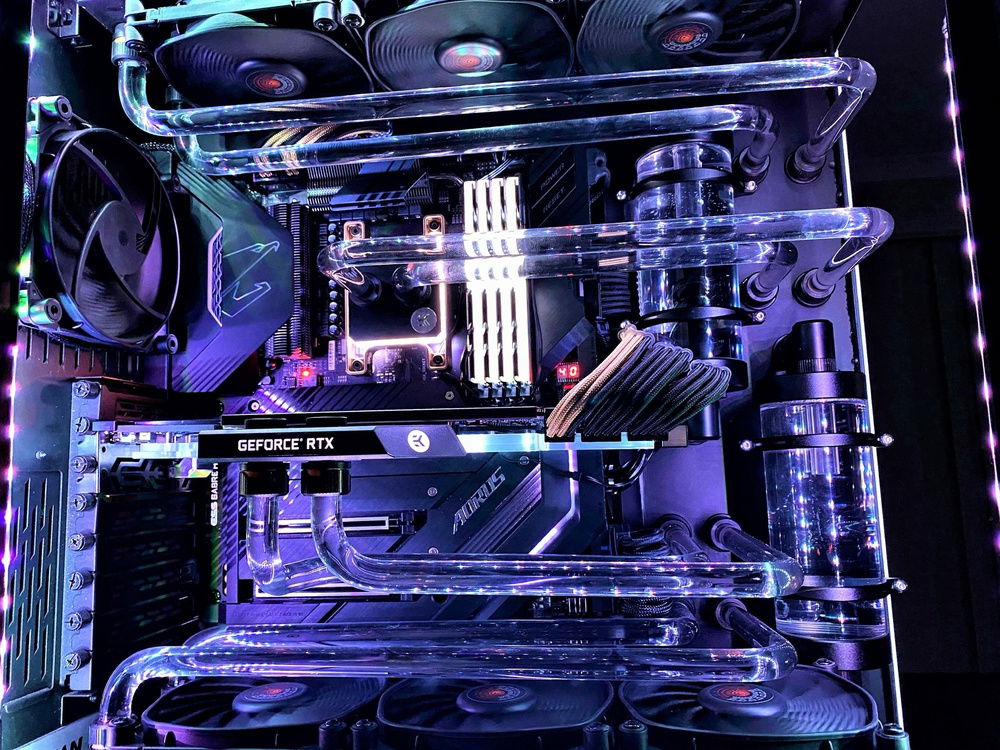
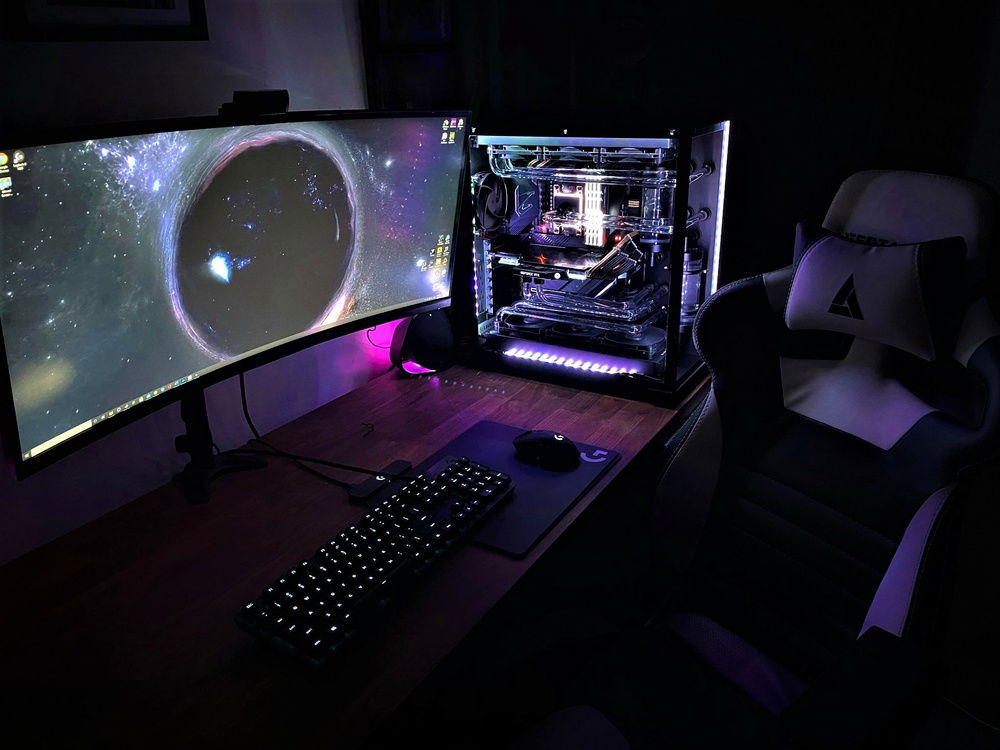
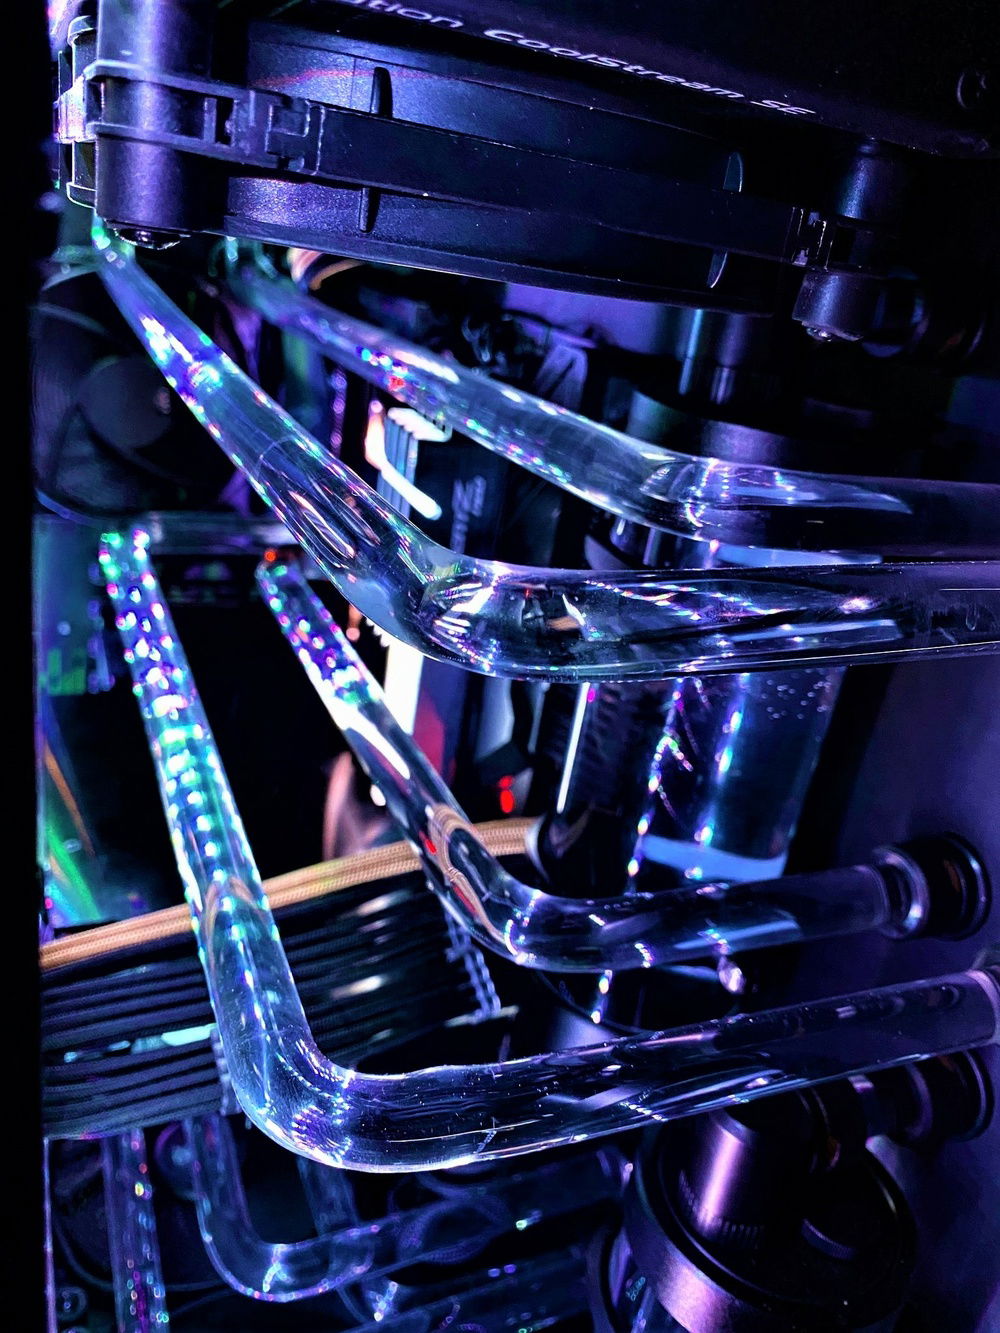
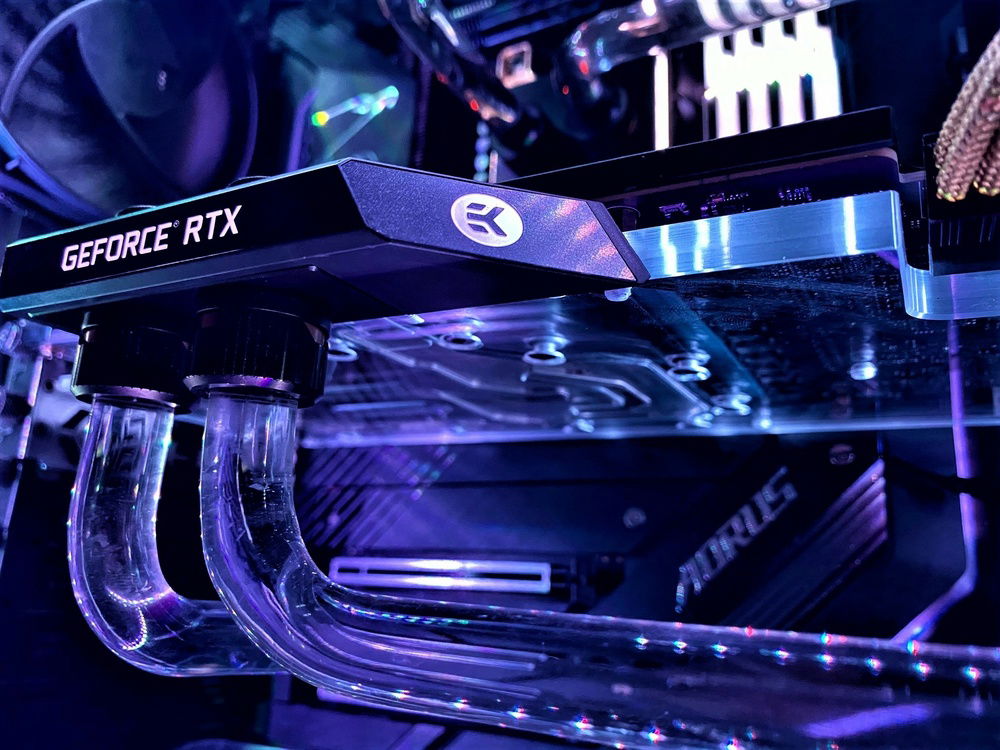
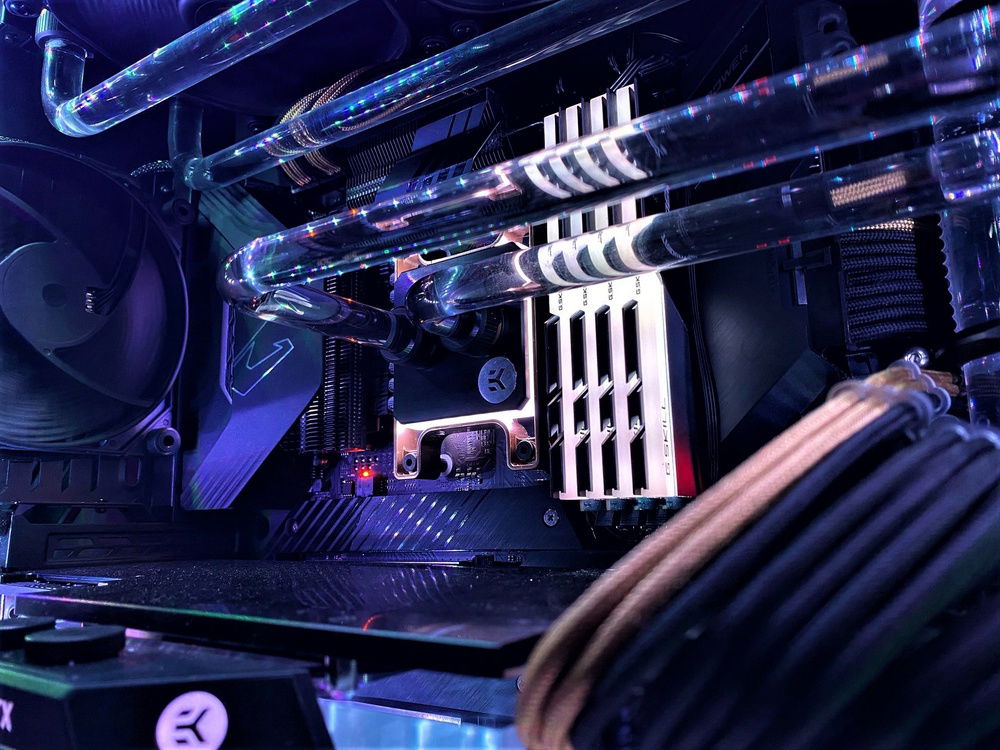
Aesthetics: I personally love it. The parallel tubing, more subtle lighting (note I normally have the RGB on CPU, GPU and RAM), the black with gold highlights have perfectly hit the look that I was aiming for.
Noise: This system is silent! With the pumps in the rear and the BeQuiet! Silent Wing 3 fans the noise signature. Even at full load this system is by far the quietest system that I have ever built. I highly recommend the Singularity Computer pumps and these fans for a truly silent experience.
Temperatures: The two systems both have excellent temperature whilst underload. CPU sits at around 55 degrees whilst gaming with fans at 65% and GPU 45% with fans at 50%. Both systems run with independent fan curves and pump curves which allow for optimal flow and noise reduction.
Fill and Drain: Both systems drain from the rear outlet of the pumps. There are no coolant pockets (except the bottom radiator) and the fill patter requires one cycle before the loop begins to regulate. This allows for very quick disassembly and assembly.
NO RGB!!: YES, IT IS A POSITIVE! The lack of RGB cables every is amazing and I highly recommend it. The system looks so much smarter and more professional (in my opinion) without it and the overall appearance is much cleaner.
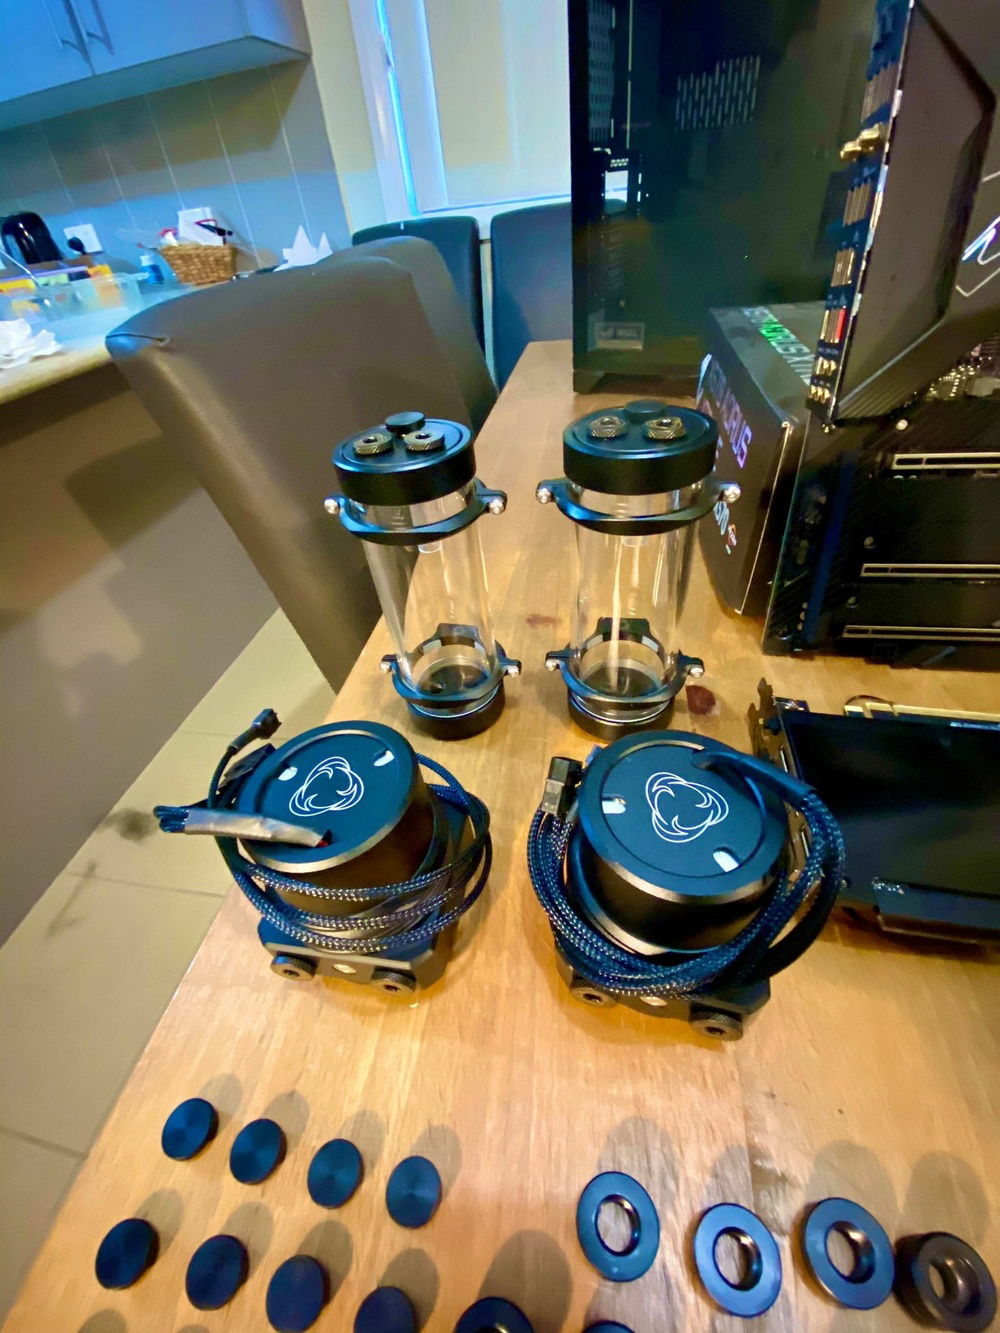
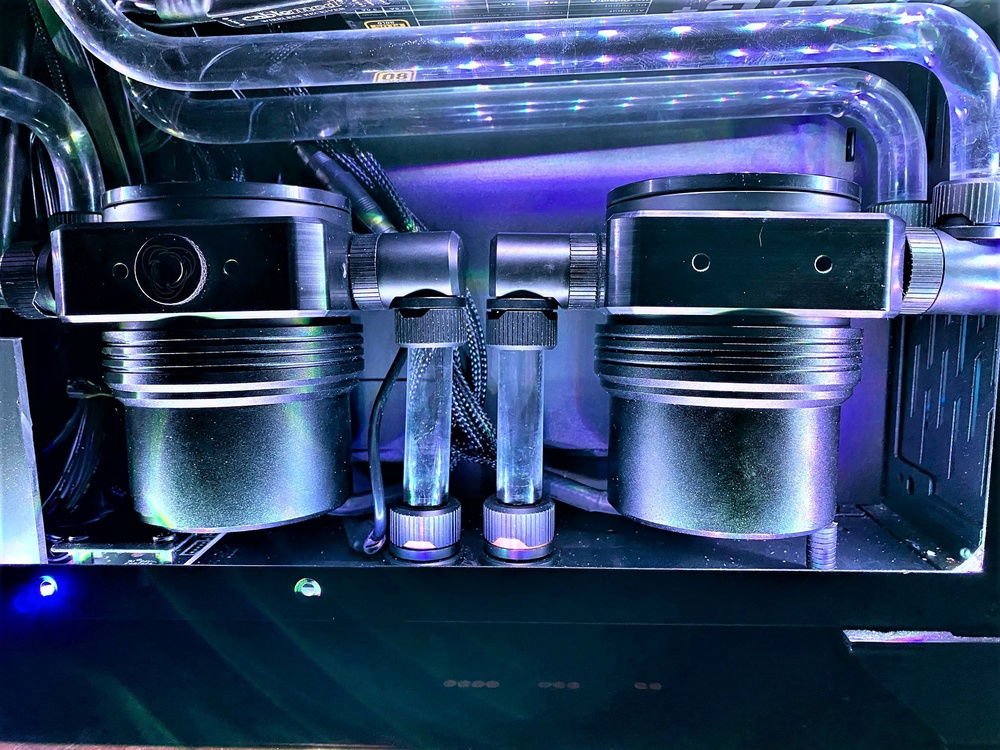
Singularity Computer Pumps and Reservoirs: The reservoirs and mounts are brilliantly designed and work wonderfully with the EK Torque fittings. They provide mounting screws, universal mounts and excellent customer service when you need to ask questions. The two pumps mounted in the back of the case came with sleeved cables and offer multiple inlet options with a well-positioned outlet ports. They are quality components, perfectly machined and expertly designed I would highly recommend them
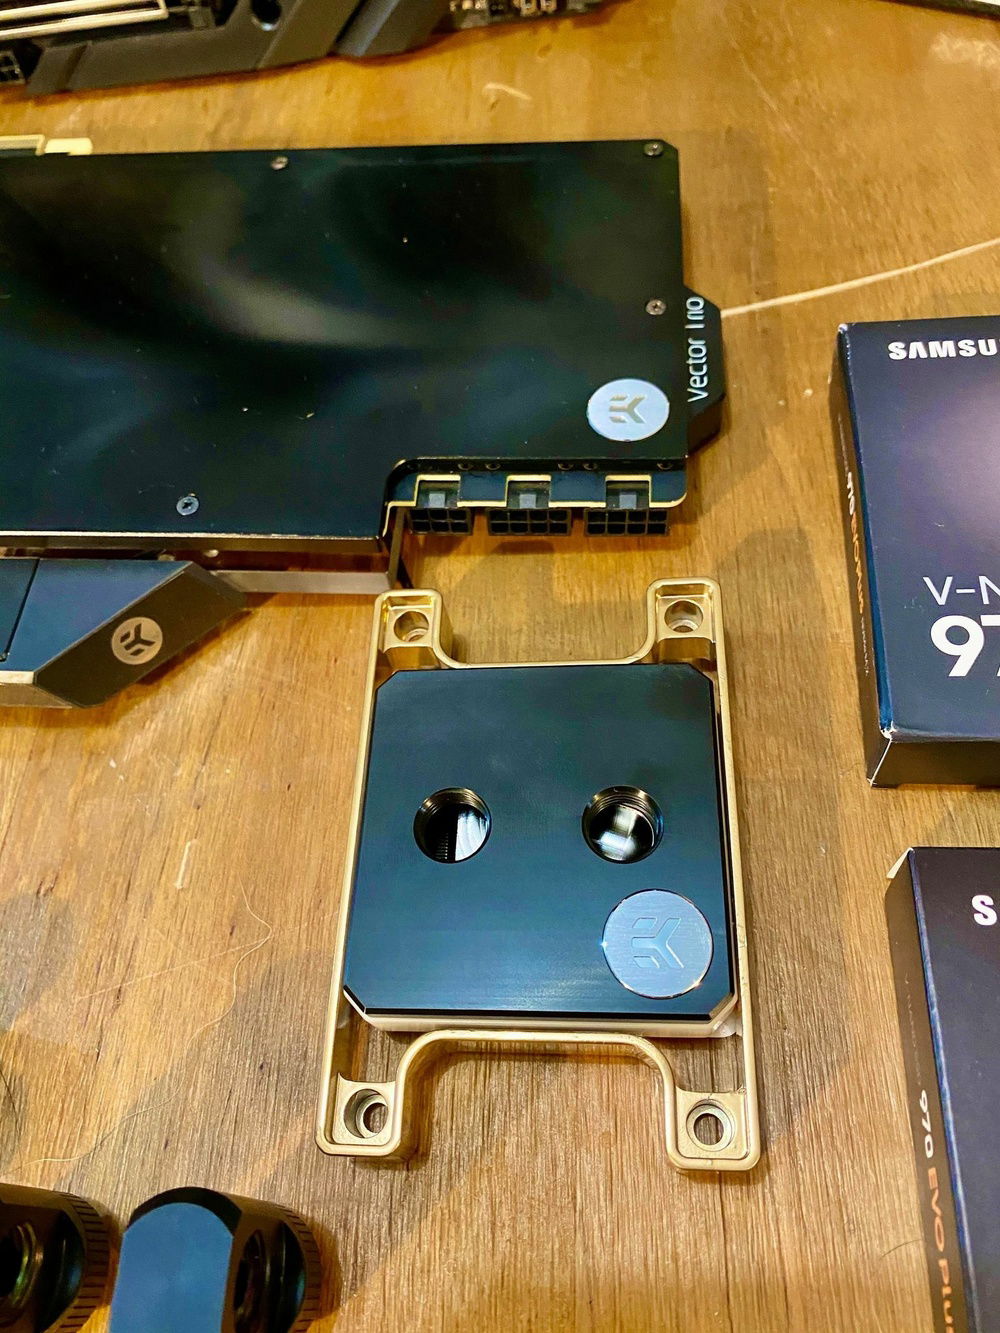
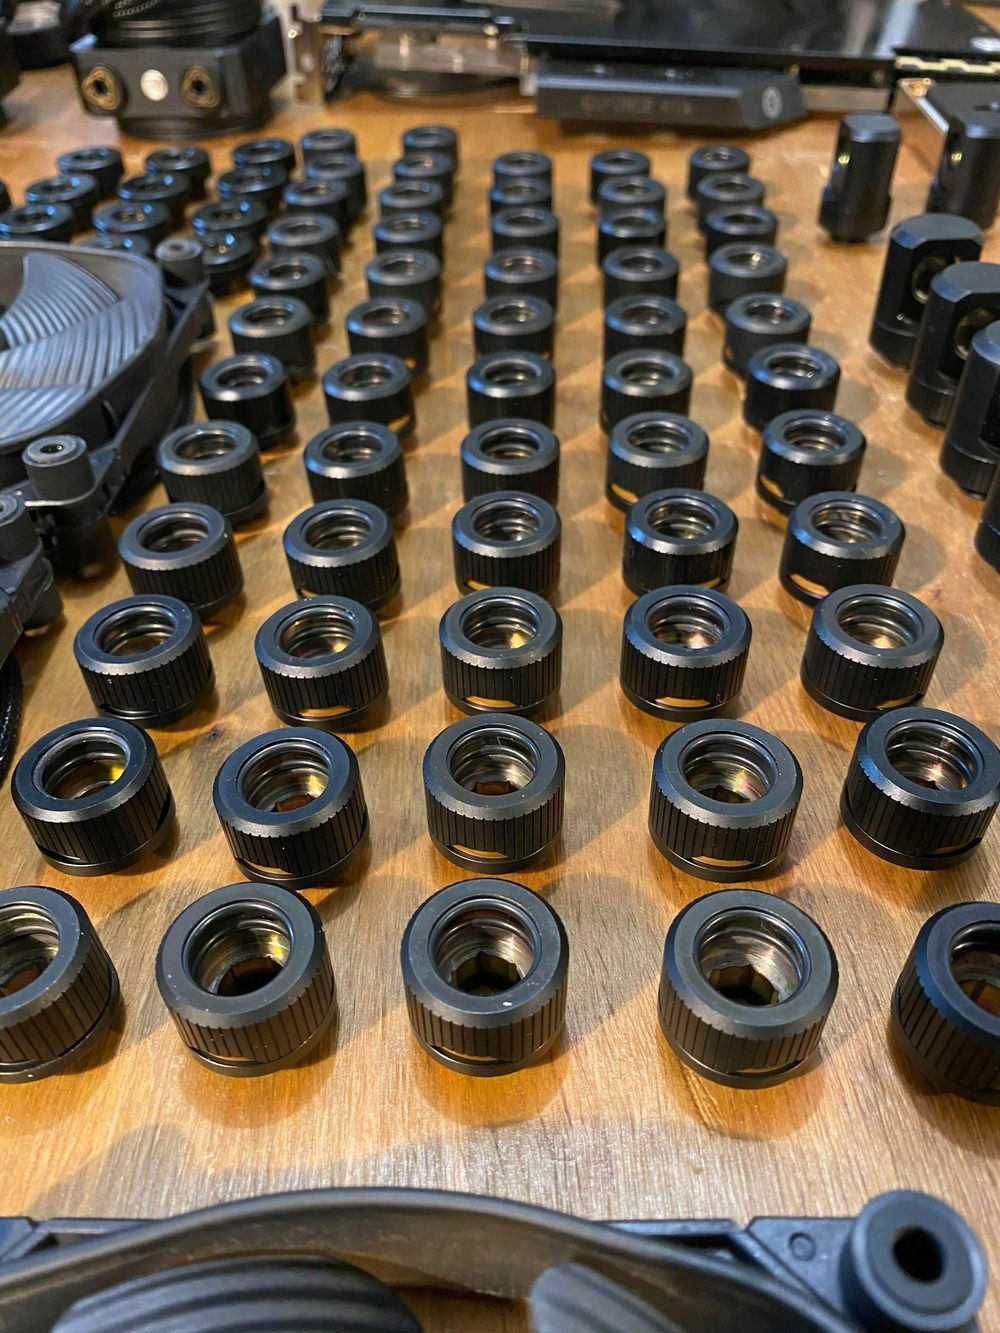
EK Torque fittings: I was a diehard bitspower fittings man, but I am firmly converted. These fittings have a high profile (note they have developed a low profile option now) and when I first saw them I was unsure how they would perform. No leaks, broken O-Rings, threaded screws, or anything of that nature. These are brilliant fittings and I would highly recommend them and will be using them in the future.
OVERALL:
I am really happy with the way that this build turned out. I have tried multiple new skills including, acrylic centre pieces (with bends), compact dual loops, tube runs with 5 different 90 degree bends, pushed my design concepts further than ever before and I feel that it has hit the mark for me. There were many learning points taken from this that I will use in my future concepts, but I thoroughly enjoyed this build.
As always, any question please send a message.
I present to you all PHOENIX my next build. As is tradition there’s also the large build log to take you along the journey that was this build. The aim, as always, is to provide you with an honest insight into the process so you can plan your own and not face the same problems I have had.
Entering this process I had three key objectives I wanted to achieve:
1) Build a true dual loop inside a lian li O11-D
2) Present a unique look in one of the most common cases in the world
3) No RGB, professional finish.
Good news, I think we achieved all of these!
CHALLENGES:
Central Manifold construction: I have never done a full acrylic centre manifold with a bend through the centre before. This provided a challenge in that I used only a heat gun to bend the acrylic and realised too late that I would not be able to bend it twice, once inwards, and then outwards. This meant that I needed to cut the sheet that has the reservoirs off the main piece and attach this later. This is two sheets of acrylic that I have glued and sealed together to form one. The main piece of acrylic was then fastened to the case through four screws that also attached the pumps to the rear. The measurements of the cable holes (done for the first time), screw holes, res mounts all required forward planning and allowed for no errors due to the restriction on space. For first time cable hole drilling I recommend getting one of the cable combs from your cables and using it as a stencil to get your spacing right. If the holes are too far apart then it can separate the cable runs and ruin the look of the run. Additionally, you must take the time to ensure your mounting holes are level and square, if one of these is off then you will have a crooked reservoir and having them next to each other it will really show. I would recommend doing a test mount on a separate sheet to make sure your measurements are correct so you don’t ruin your main piece.
Spacing of Reservoirs: The original plan had them next to each other but due to the lack of space meant that this was not possible. I planned to use the dual ethereal mount from Singularity Computers but this was unavailable, so they were able to switch this for me for four singles. These mounts added additional width and therefore did not allow for parallel mounting. The confined space was restricted further by the requirement for the four pass-throughs and the inlet/outlet ports of the reservoirs. The process of measuring this was the longest part of the build but by far the most important. I would recommend ensuring you have two known straight edges (corners of the acrylic) to use the right-angled rule to achieve true measurements and as always MEASURE TWICE CUT ONCE.
Rear Tubing: As I am a sucker for pain, I decided to do hard tubing in the rear of the case to the two Singularity Computers pumps. These were by far the hardest bends to route and provided an even greater challenge with cable management at the rear. An unforeseen issue with the rear fittings was the conflict between the top right Torque fittings and the rear of the front IO. To overcome this, I used a Dremel on the housing of the USE 3.0 to allow the fittings to slide past which was incredibly tight. It requires that little bit more effort, but I always feel it is worth it to have the tidy front and read tubing. I will continue to work on the rear of the case into the future to tidy this further.
Rear Cable management: The cables are bunched at the top of the case, but this looked messy. I made a cover for them and this will be refined later. It achieved what I needed it to do for now. Small zip ties are your friend! I had additional cables that will be added in the future to reduce the amount of clutter and will hopefully allow me to remove the makeshift shroud.
Rear mount pumps: The spacing of the pumps and the PSU was challenging as this meant that the hard bends required a tight 90 degrees straight out of the pump to not hit the PSU directly above it. Having them in the rear increases the heat in the back of the case quite significantly. Though noticeable this has not provided any issues so far as it does not flow into the front of the case except for next the motherboard on the righthand side. The top and bottom fans extract this before it gets to the main chassis though.
Airflow: Originally the fan at the top left was not there. This caused temperature issues due to the restricted airflow which was caused by the new acrylic manifold blocking the intakes and the two radiators are on exhaust. I thought that there would be enough air drawn in through the back of the case but this was not what happened and I had a spare fan which went into that place perfectly. It works off its own fan curve that is 10% faster than the CPU fans. As it sits in the rear of the case this is not noticeable. The addition of the fan provided the necessary airflow which lowered the overall temperatures of the case and the systems in it.
PROS:
Aesthetics: I personally love it. The parallel tubing, more subtle lighting (note I normally have the RGB on CPU, GPU and RAM), the black with gold highlights have perfectly hit the look that I was aiming for.
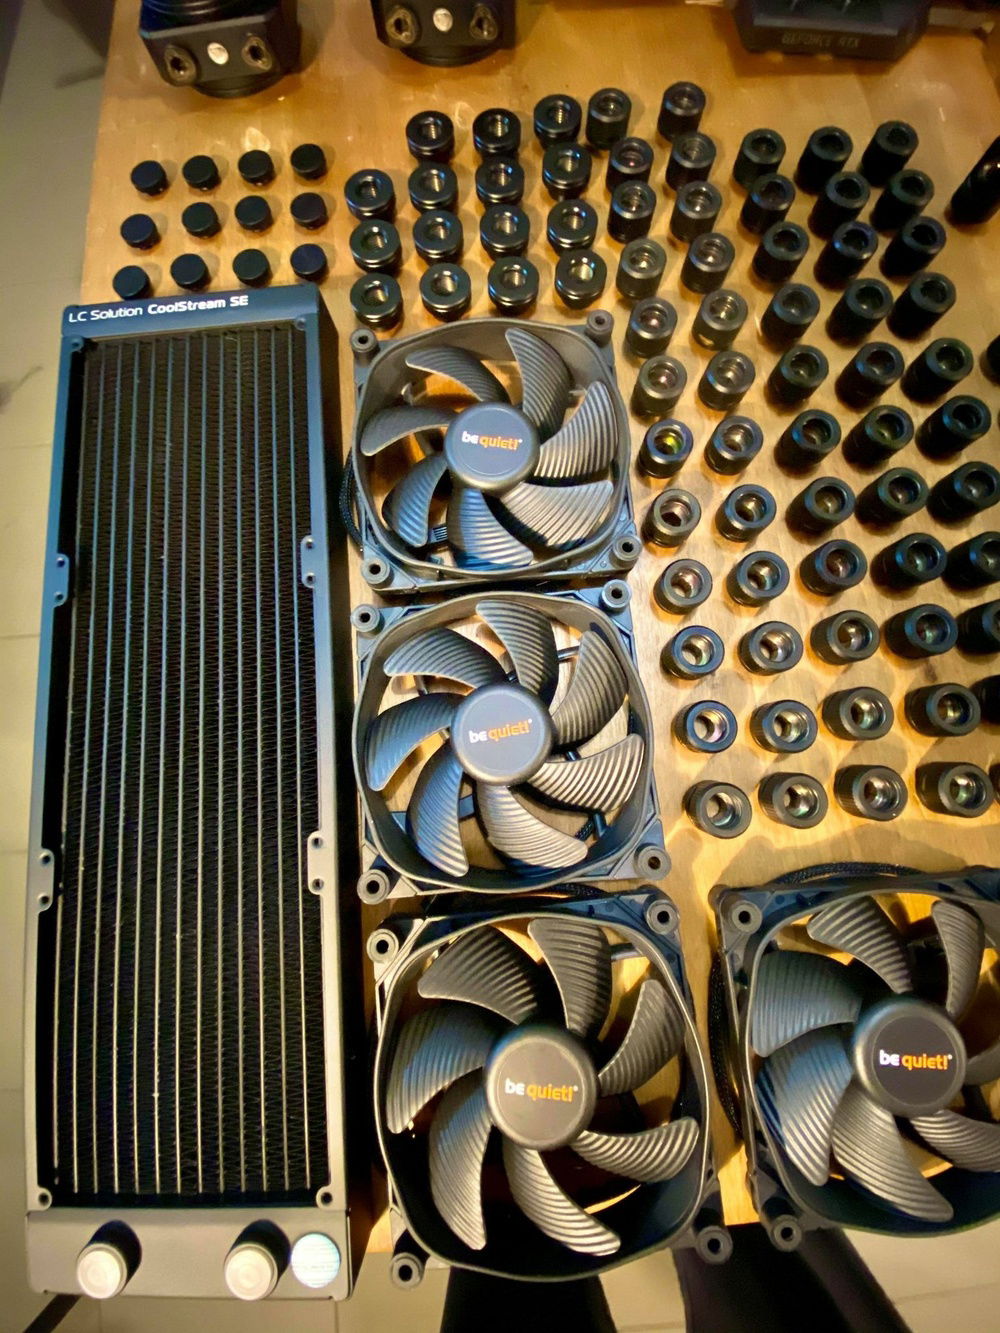
Noise: This system is silent! With the pumps in the rear and the BeQuiet! Silent Wing 3 fans the noise signature. Even at full load this system is by far the quietest system that I have ever built. I highly recommend the Singularity Computer pumps and these fans for a truly silent experience.
Temperatures: The two systems both have excellent temperature whilst underload. CPU sits at around 55 degrees whilst gaming with fans at 65% and GPU 45% with fans at 50%. Both systems run with independent fan curves and pump curves which allow for optimal flow and noise reduction.
Fill and Drain: Both systems drain from the rear outlet of the pumps. There are no coolant pockets (except the bottom radiator) and the fill patter requires one cycle before the loop begins to regulate. This allows for very quick disassembly and assembly.
NO RGB!!: YES, IT IS A POSITIVE! The lack of RGB cables every is amazing and I highly recommend it. The system looks so much smarter and more professional (in my opinion) without it and the overall appearance is much cleaner.
Singularity Computer Pumps and Reservoirs: The reservoirs and mounts are brilliantly designed and work wonderfully with the EK Torque fittings. They provide mounting screws, universal mounts and excellent customer service when you need to ask questions. The two pumps mounted in the back of the case came with sleeved cables and offer multiple inlet options with a well-positioned outlet ports. They are quality components, perfectly machined and expertly designed I would highly recommend them
EK Torque fittings: I was a diehard bitspower fittings man, but I am firmly converted. These fittings have a high profile (note they have developed a low profile option now) and when I first saw them I was unsure how they would perform. No leaks, broken O-Rings, threaded screws, or anything of that nature. These are brilliant fittings and I would highly recommend them and will be using them in the future.
OVERALL:
I am really happy with the way that this build turned out. I have tried multiple new skills including, acrylic centre pieces (with bends), compact dual loops, tube runs with 5 different 90 degree bends, pushed my design concepts further than ever before and I feel that it has hit the mark for me. There were many learning points taken from this that I will use in my future concepts, but I thoroughly enjoyed this build.
As always, any question please send a message.
Color(s): Black Gold
RGB Lighting? No
Theme: none
Cooling: Custom Liquid Cooling
Size: E-ATX
Type: General Build
Contests
This build participated in 2 contests.
| Rank | Contest | Date |
|---|---|---|
| #92 | Build of the Month - April 2021 | ended |
| #29 | Build of the Month - December 2020 | ended |
Hardware
CPU
$ 395.00
Motherboard
$ 699.99
Memory
$ 159.98
Graphics
Storage
$ 64.99
Storage
$ 191.98
Storage
$ 81.50
PSU
$ 249.99
Case Fan
$ 284.06
Cooling
$ 209.06
Cooling
$ 51.99
Cooling
Cooling
Cooling
$ 21.88
Cooling
Cooling
CableMod
Accessories
$ 8.98
Approved by: